Coffee brewing is nothing if not an art form.
You may remember your parents or grandparents brewing coffee at home in a silver percolator on the stove.
Or even buying your first electric coffee maker. You couldn’t help but enjoy the convenience of scooping the coffee in, pushing the ‘brew’ button, and letting it create a tasty cup of java for you all on its own.
You’ve also likely experienced the joy of sampling different types and styles of cappuccinos, lattes, Turkish coffees, espressos, and many other different brews.
Here’s the thing:
There are many different coffee brewing methods — and there’s a ‘science’ to each one.
Master baristas have handed down this ‘science’ from all parts of the world. And it serves as the basis for all the many different types of coffee brews enjoyed today.
And in this post, you’re going to learn about them all.
In this coffee brewing methods comparison, you’re not just going to learn about the many different types of coffee brews in existence. We’ll also reveal how to make these brews and what sets each one apart from the others.
Get ready to learn all about coffee brews!
But first, you need to learn a little bit of history — the origins of the ‘coffee fruit’ and how the great ‘coffee trade’ began.
Where Did Coffee Come From?
The specific origin and discovery of everyone’s favorite caffeinated beverage remain a bit of a mystery.
But there are legends about it.
We can trace the origins of the native coffee plant to the ancient coffee forests of Ethiopia.
There’s a legend in those parts that tells of a goat herder named Kaldi.
Many believe that this boy noticed that whenever the goats ate the berries from this one specific tree (coffee fruit), they’d get so energetic that they wouldn’t sleep at night.
Kaldi, his curiosity aroused, reported the finding to an abbot at the local monastery. The abbot, as an experiment, made a drink with the ‘berries.’
He ended up staying awake into the late hours of the evening for prayer, his body and mind energized.
Thrilled with his discovery, the abbot shared these precious ‘berries’ with other abbots in other monasteries. And the word of these mysterious, energizing fruits and the incredible drink that you could make with them began to spread eastward.
In time, word of this ‘miracle fruit’ reached the Arabian peninsula, and the great ‘coffee trade’ was born.
(Interesting fact: The coffee beans you now buy at the grocery store aren’t actually ‘beans’ at all. But they are the seeds of the red, juicy, cherry-like coffee fruit.)
The Four Basic Coffee Brewing Methods

On the technical level, the phrase ‘brewing coffee’ refers to the process of using hot water to extract hundreds of unique soluble compounds from roasted and ground coffee.
Some of these compounds include:
- Sugars
- Carbohydrates
- Lipids
- Acids
- Caffeine
This happens when you brew coffee using a simple electric coffee maker at home or buy a single cup of coffee at a coffee shop.
You’ll apply hot water (or sometimes cold water) to coffee grounds. This extracts the soluble compounds from them, depositing the ‘beverage’ into your coffee pot to consume and enjoy.
But now that you understand this basic premise, you likely also recognize that there’s more than one way to introduce water to your coffee beans.
To be more specific, there are four basic styles of brewing:
- Decoction (through boiling)
- Infusion (through steeping)
- Gravitational feeding (used in drip brewing)
- Pressurized percolation (such as when brewing espresso)
Alright.
Now you know the four basic styles of coffee brewing. It’s time to take a closer look at how this translates to the different types of coffee brews you know and love.
So let’s do a deep dive and compare the 20 most common coffee brewing methods in use today.
Decoction (Boiling) Coffee Brewing Methods
1. The Cowboy Coffee Method
‘Cowboy coffee‘ is so-named due to its rich history as a beverage enjoyed by American pioneers on the trail.
It’s the simplest method for brewing coffee and requires only a pot and coarse grind size coffee.
To make coffee with the cowboy coffee brew method, bring your pot of water to a boil. Then, remove the pot from your heat source and let it sit for about 30 seconds (to let it dip down right below 200 degrees Fahrenheit).
Next, add about two tablespoons of coarse grind coffee per eight ounces of hot water, stir it up, and let it sit for about two minutes.
Then stir it again, and let it sit for another two minutes.
After brewing for about four minutes, you’ll notice that the coffee grounds will be floating on the top. You can pour a half cup of cold water on the grounds to push them downward. Then, pour your cup of coffee — pouring slow enough that the grounds/sediment don’t pour out with it.
2. The Turkish Coffee Method
Like the cowboy coffee method, the Turkish coffee method is a very ancient and simple brewing process. It involves boiling coffee in a long-handled cezve.
The traditional Turkish coffee method involves adding water to a cezve, infusing a bit of sugar for taste, and bringing the mixture to a boil.
Next, you’ll remove the cezve from the heat source, add your coffee (a very fine grind), and then place it back onto your heat source.
You can then bring the water to a boil twice. Each time, remove it from the heat source and discard the accumulated ‘foam’ that has gathered at the top of the cezve.
Or you can stir it back into the mixture (based on your preference).
You should allow the remaining coffee ‘powder’ to settle before serving. You can also add a small bit of cold water to the pot after the second boiling to help the coffee grounds settle to the bottom.
Infusion (Steeping) Coffee Brewing Methods
3. The French Press Method
The French press coffee method utilizes a device called a ‘French Press.’
For the best results, start with whole coffee beans, and use a coffee grinder to grind the beans yourself. If you have a nifty kitchen scale, don’t forget to weigh your coffee to get the ratio right.
If you don’t, you’ll have to measure it out yourself.
Grind your beans to a medium grind, and pour them into the bottom of the French press.
Baristas know that perfect water temperature is the key to making French press coffee taste good. A good rule of thumb is to let the water boil, then remove it from the heat source for about a minute.
Pour the hot water over the coffee grounds in the press.
Next, give the coffee grounds a nice stir, and leave them to sit and ‘brew’ for a few minutes (usually about five minutes).
After this, the coffee will be ready. Press the plunger down to separate the coffee from the water, and pour the resulting coffee as desired.
Our step-by-step guide to making french press coffee.
4. The SoftBrew Method
The SoftBrew brewing method is a newer brewing trend, based on a device called a SoftBrew coffee pot, invented in 2010 by a man named George Sowden.
This coffee brewing method requires a SoftBrew coffee pot, a special type of coffee pot containing a metal filter. This filter suspends the coffee grounds in boiling water for full immersion, acting as a high-tech teabag.
To make coffee using the Sowden SoftBrew method, start by placing the filter in the coffee pot. Then, scoop an appropriate amount (about two tablespoons of coffee per every six ounces of water) of your favorite coarse-grind coffee into the filter.
Next, boil your water in a separate pot or container. Then, remove the water from your heat source. Let it stand for about 30 seconds before pouring it through the filter, making sure to soak all the coffee grounds as you fill the SoftBrew pot.
The coffee will need to brew for about four minutes.
Once it’s done brewing, remove the filter and pour your fresh soft-brewed coffee as desired.
5. The Coffee Bag Method
The coffee bag brew method works pretty much exactly like using a teabag to make tea.
You can either buy coffee bags pre-filled with coffee or grind your own roast and use empty coffee filter bags to steep the coffee in your water.
This is a simple brewing method.
You’ll heat water using a kettle or a pot. Once the water boils, remove it from the stovetop. Allow the water to cool for about 30 seconds, then place your coffee bag in a coffee cup and slow-pour your coffee over it.
Make sure that all grounds get soaked. As a general rule, a brewing time of about four minutes works best for this method.
You can adjust the strength of the brew by changing the steeping time.
Steep for two to three minutes for a weaker cup. Or five to six minutes for a stronger cup.
6. The Vacuum Pot Method
The vacuum pot method requires an actual vacuum coffee pot and utilizes a siphon mechanism to brew coffee.
A vacuum pot usually comes with a siphon rig, which consists of:
- A burner
- A bottom-beaker
- A stand and a clamp (for holding the bottom-beaker over the burner)
- A top beaker
- And a filter that sits at the bottom of the top beaker
For best results, you’ll want to use a medium grind coffee.
The process is straightforward.
First, boil water.
Then remove the water from your heat source so that it cools to right below boiling temperature.
Next, add water to the bottom beaker. Then, fire up your burner, turn it up pretty high, and place it beneath the bottom beaker.
Loosely place your top beaker over the bottom beaker, and wait for the water in the bottom beaker to start boiling again.
Once it starts to boil, set your top beaker so that it creates a seal. Now, it’ll draw the water up from the bottom beaker through the filter and up into the top beaker.
Then, add the coffee to the top beaker and stir it in. For brew time, give it about one minute and 45 seconds.
After that, cut the heat from the burner, and give the top beaker another couple of stirs. As the heat dissipates, the coffee will start to move back down into the lower beaker — leaving the grounds and sediment filtered out in the top beaker.
Gravitational Feeding (Drip Brewing/Percolator) Coffee Brewing Methods
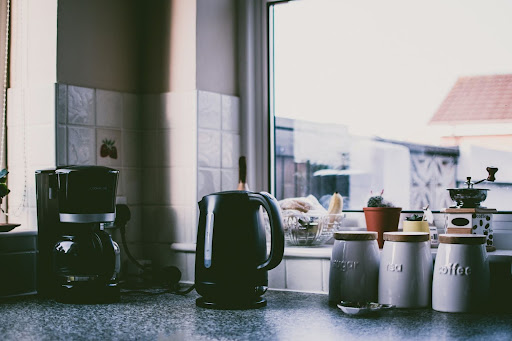
7. The Modern Electric Coffee Maker/Percolator
The vast majority of modern homes have an electric coffee maker, also known as an electric percolator.
This machine makes the process of brewing coffee incredibly simple.
Fill the coffee maker with water, add coffee grounds and a filter (or a pre-filled cartridge, such as with a Keurig coffee maker), and press ‘brew.’
The water heats up and turns to steam, forcing it through a tube as it turns to steam. It then drips down onto the coffee grounds, runs through them to extract your brew, and drips down into the carafe to give you your coffee.
The upside to this method is that it’s super simple and makes consistent brewing pretty much foolproof.
The downside is that it gives passionate coffee lovers almost zero control over the quality of the brew.
8. The Stove-Top Percolator Method
The stove-top percolator dates back to the early 1800s by a Parisian tinsmith named Joseph-Henry-Marie Laurens.
Since then, it’s developed a reputation for being simple to use, easy to clean, and cheap to buy.
The stove-top percolator also stands out as one of the simplest coffee brew methods out there. Yet, it’s not as convenient as its more modern electric counterpart.
Here’s how to brew coffee using this method.
First, fill the carafe with water. Then, scoop coffee into a filter, and set the filter (and stem) inside the carafe.
As the water heats up, it bubbles and turns to steam. It’s then forced up through the center stem and up to the coffee filter basket at the top. The water then drips down through the coffee and continues to cycle until the coffee finishes.
9. The Clever Dripper Method
The Clever dripper method is another easy one.
The Clever dripper recipe itself is a ‘steep and release’ apparatus that’ll hold a filter and coffee. It’ll then release the brew down into your container using a gravity feed when placed on a mug or carafe.
You need a Clever dripper, a paper filter, and a mug or carafe.
Start by measuring out your coffee (use a coarse grind with this method).
Then, place the paper filter in the Clever dripper, wetting it a bit with your water before adding the coffee. The water should be boiling but removed from the heat source.
After, put the coffee into the filter and pour over the water (preferably using a gooseneck kettle) so that you soak all the coffee. The clever dripper will capture the water and hold it so that you can brew the beverage to taste (usually about three minutes total).
Then, place the apparatus on your container to open its gravity feed and pull the liquid down through the grounds.
The result?
A delicious, hot, freshly brewed cup of coffee.
10. The Chemex Method
The Chemex coffee maker comes from a German man by the name of Dr. Peter Schlumbohm. He patented hundreds of inventions after moving to the United States, the Chemex being the most popular.
It earned its patent in 1941 and first saw production in 1942. Since then, it’s become an ‘American classic’ as far as coffee makers go.
The classic Chemex itself is just a single piece of glass with a wooden collar and a tie.
You can brew coffee with the Chemex by placing the special Chemex filter into the top and putting your coffee into the filter (usually a coarse grind).
Then, pour over your boiling water, making sure to soak your coffee thoroughly.
The coffee will brew as the water drips down through the grounds, leaving a beautiful, fresh batch of java in the bottom part of the container.
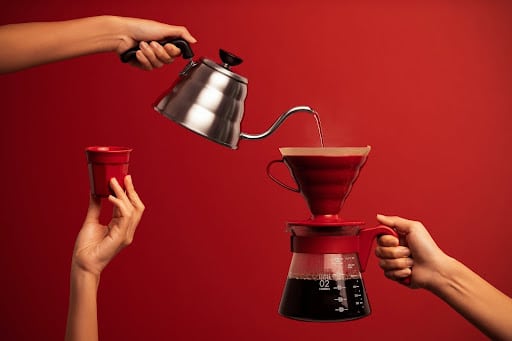
11. The Hario V60 Dripper Method
The Hario V60 is one of the more popular drippers among passionate coffee enthusiasts.
Why?
Because it gives the barista an incredible amount of control over the brewing process.
The downside of the Hario V60, though, is that it can be a challenge to get used to.
You’ll place the Hario V60 on top of your mug or carafe, place the filter inside, add the coffee, then ‘pour over’ your coffee with near-boiling water to brew.
Gravity will pull your brew down through the filter, through the single large hole at the base of the Hario dripper, and into the container below.
12. The Kalita Wave Dripper Method
When you first look at a Kalita wave, you’ll think that it looks very similar to a Hario V60, and for a good reason. It’s another pour-over coffee brew method, just like the methods used with the Hario V60 and the Chemex.
The main differences lie within the design of the dripper itself.
The Kalita dripper has three small holes, which makes it different from its single larger-holed Hario counterpart. It also has a flat bottom instead of the 60-degree angled cone that the Hario dripper uses.
The idea behind these minor design differences is that they’re said to make the Kalita wave dripper method more consistent.
The main criticism of this dripper method is that the filters are sometimes known to clog the smaller drain holes. This can cause hiccups in the coffee-making process.
13. The Vietnamese Drip Filter Method
The Vietnamese drip filter method is another pour-over method and is very similar to the Hario and Kalita brewing methods.
This traditional brewing method comes from Vietnam, where it got its name.
The main difference is that a Vietnamese dripper has a unique and different design. The thing that sets this type of dripper apart is that it’s shaped more like a teacup and has many tiny holes in the bottom.
First, pour coarse-grind coffee right into the dripper (no filter required). Then, you’ll push the metal dispersion screen down onto the grounds, packing them in rather tightly.
After that, place the filter on your cup or carafe and pour a bit of boiling water into the cup to wet the grounds. Once this first bit of water has soaked through and ‘wet’ the coffee, you can fill up the dripper and complete the brew.
14. The Melitta Dripper Method
The Melitta dripper is another pour-over coffee dripper, invented by a German housewife named Melitta Benz.
It’s a one-hole dripper that’s very similar to the Hario or Kalita wave drippers.
The main upside to this dripper is that it’s easy to use and tends to give you a reliable brew time after time.
The downside?
If you don’t grind your coffee perfectly, you might face an over-extraction issue. That’s where the water becomes trapped and doesn’t drip through the coffee and filter fast enough.
15. The Bee House Dripper Method
The Bee House dripper is one of the simplest drippers to use. In many ways, it’s like Melitta and Kalita drippers in that it offers a pretty standard pour-over design.
There are two holes in the bottom of the Bee House dripper, and you need to use a filter in it. It also has an ergonomic handle on the side, making it easier to handle without burning your hand.
As is the case with most drippers, your grind size will determine how fast the water flows through, so that’s where the barista’s ‘skill’ comes in.
The con to this type of dripper is that it doesn’t give you a lot of power over the quality of your brew.
It’s easier to use than the Hario V60, but a dripper like the Hario will give you a lot more control over the quality of the final product.
16. The Cold Drip Brewing Method
Cold drip coffee is coffee brewed using the foundational basics of the ‘dripping’ method. But instead of using hot water, it utilizes cold water.
There are a lot of cool cold drip apparatus options.
But some of the most popular options come from Tiamo.
These ‘Cold Drip Towers’ are not only beautifully designed but are also specifically crafted to give you an amazing cold drip-brew.
Cold brew coffee is notorious for having less acidity and bitterness. It’s also known for being smoother to drink and an overall great-tasting coffee.
Yet, the downside is that cold drip takes longer to extract the flavor and caffeine. It can take three to five hours to cold brew coffee.
With higher heat comes faster extraction.
For best results, your coffee grind should be about medium coarseness with this method.
Read our full guide to making nitro cold brew coffee here!
Pressurized Percolation (Espresso) Methods
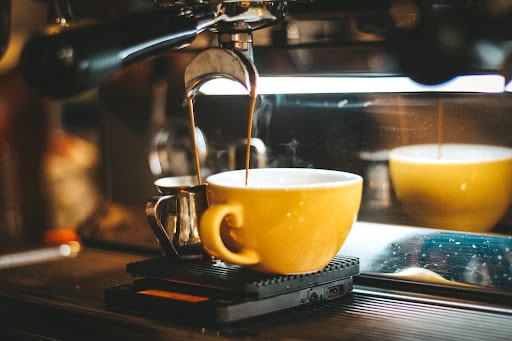
17. The Espresso Machine Method
By the dawn of the 19th century, coffee was a big business.
In fact, it was so big that inventors were hard at work trying to figure out how to improve coffee brews and reduce brewing time.
Making great coffee with a dripper can take up to five minutes.
But if you need to make a lot of it, the wait times can get long.
And so, the espresso maker became the solution to this problem.
At the fundamental level, espresso is a coffee brewing method where you force pressurized hot water over coffee grounds to make a very concentrated brew.
Espressos have a reputation for their deep, robust flavors. In fact, many of the most well-known coffee drinks in the world use espresso as a key ingredient.
Five of the most popular types of coffee drinks made with espresso include:
- Latte: A shot of espresso topped with steamed milk and foam
- Cappuccino: A shot of espresso featuring steamed milk
- Macchiato: Made from equal parts espresso and steamed milk
- Mocha: Made with espresso, chocolate, steamed milk, and whipped cream
- Americano: Made with espresso and hot water
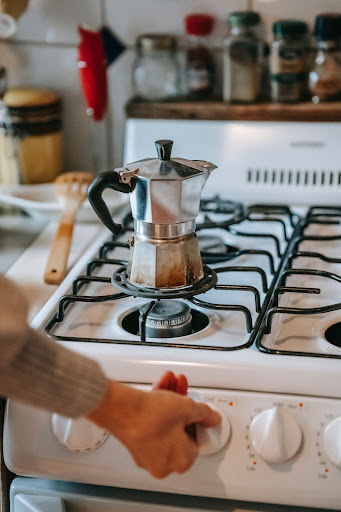
18. The Moka Pot Method
A Moka pot is a coffee maker that makes a delicious brew by pushing pressurized steam through ground coffee.
You’ll start by filling the base with hot water. Then, fill the filter funnel with coffee. Screw the top part down onto the base to assemble the Moka pot.
Then, place the pot on your heat source. As the temperature of the water increases, the pressure will start to build up.
And as that pressure builds up, it’ll push the steam out of the base, up through the filter funnel (and the coffee within it), and finally, up through the stem in the center of the top part.
Once the top part is full, you have your fresh-brewed cup (or pot) of Moka coffee!
Learn all about the Moka pot brewing method here.
19. The AeroPress Method
AeroPress is a type of coffee maker invented by a man named Alan Adler, the founder of AeroPress Inc.
It uses an airtight cylindrical chamber and a manual syringe/plunger to steep coffee and water. You can then force the brew out of the device by pushing the plunger through the chamber.
You can use it to brew all kinds of different types of coffee. It can even brew very highly concentrated ‘espresso style’ coffee or cold brew.
Using AeroPress is a pretty simple process.
Start by placing a paper filter into the filter holder. Then, lock that into place at the end of the cylindrical chamber. Next, place the cylinder on top of your cup or carafe — whatever you plan to brew into.
AeroPress coffee generally works best with a very fine grind — even finer than you would use with a pour-over.
Add your coffee to the cylinder. Then, boil your water and pour it into the cylinder, trying your best to get all the coffee wet.
Wait and let the coffee brew for about two minutes. Then, give the AeroPress a gentle swirl to help knock the ground coffee that’s formed a crust back down toward the bottom.
Wait for about another 30 seconds. Then, apply a bit of pressure to the plunger to ‘press’ down. That’ll force the brew out through the filter and into your container.
20. The Nitro Cold Brew Coffee Method
Nitro cold brew is a method for adding nitrogen gas to your cold brew coffee, giving it a somewhat bubbly, different texture while pressurizing it.
To use this method, you’ll usually want to have some cold brew coffee to start with.
Place your cold brew coffee into a nitro coffee machine, activate the gas, and let the nitro do its work.
One to 24 hours later, you’ll have a beautiful, carbonated, pressurized cold brew coffee that’ll taste incredible.
Conclusion
There you have it!
The 20 most common coffee brewing methods, compared and ‘distilled’ down to the basics.
Which one is your favorite?
Don’t forget — brewing coffee can be cool and technical. But try not to get so wrapped up in the finer points of it that you forget to enjoy the process.
Now get out there and put your barista skills to the test!

![How to Make a Traditional Spanish Latte at Home [Coffee Recipe]](https://caffeinecraze.com/wp-content/uploads/2023/03/unnamed.jpg)